
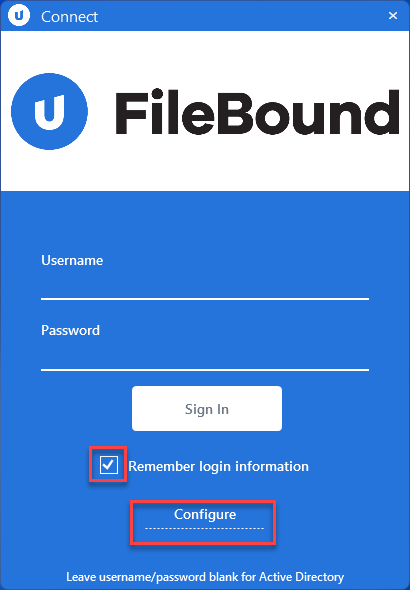
- On the Connect sign in screen click on the Remember login information if you want to have Connect to be able to login automatically and then click Configure.
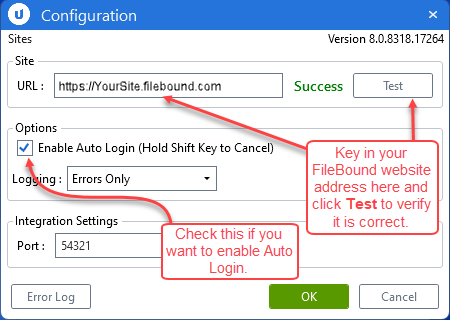
- Key in your FileBound website address in the URL box and click Test to verify that it was entered correctly. If it was entered correctly a green Success notice will appear. Check the Enable Auto Login check box to enable it and then click OK.
Note: See FileBound Connect Printer configuration recommendation instructions via this link.
Sites: A list of FileBound sites that have been previously connected. Select a site from this list to edit configuration options for that site.
Version: The Connect version number.
URL: The FileBound site URL. Before logging into Connect for the first time, it must be configured to work with a FileBound site. After entering a URL, click Test to verify that it is valid.
Enable Auto Login (Hold Shift Key to Cancel): Saves your username and password and automatically logs you into Connect the next time it is opened. To cancel the automatic login, hold down the Shift key.
Logging: Determines what information will be reported in the error log file. Select one of the following:
- Errors Only: Only errors that occur within Connect are displayed in the log file.
- Information: Logs basic information about the user activities in Connect.
- Verbose: Logs detailed information about the user activities in Connect. This type of logging is generally used by the support team for advanced troubleshooting.
Port: The port for the browser plugin to use for web integrations. The default port value is 54321.
Error Log: Displays the error log file. The information reported in the error log file depends on the option selected for Logging.