This article explains how to save an email address submitted in an e-form and then use it later for the send value in the e-mail stencil.
- Use the Custom Action Stencil to set your variable (the email address you want to save for later use).
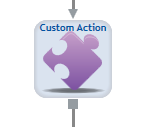
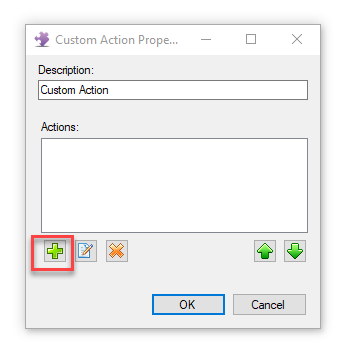
- Double click on the stencil to open it and click on the '+' icon to add an action
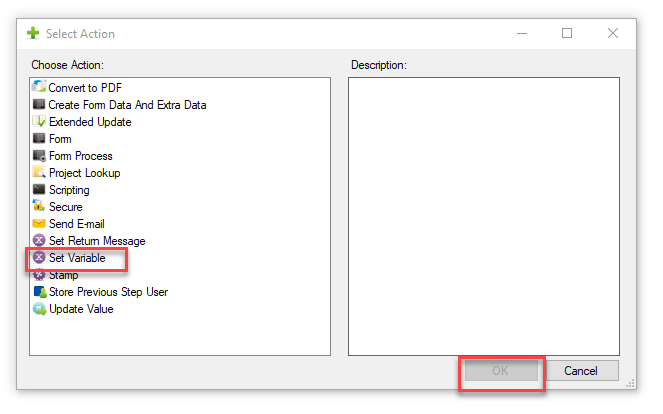
- Select 'Set Variable' and then click 'OK
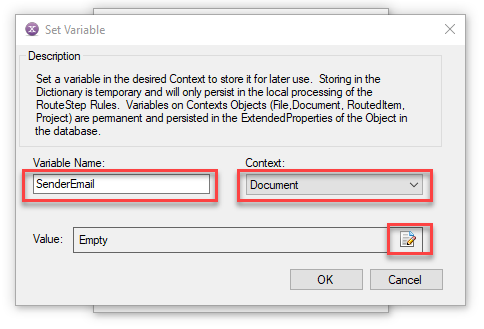
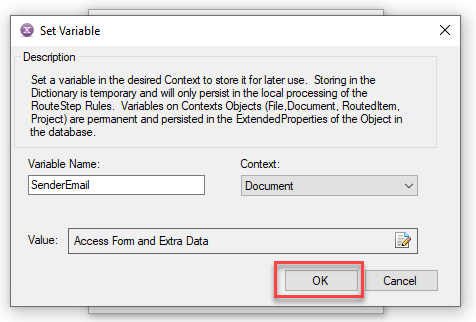
- Type in the Variable Name, this is the name you'll save the email address under and will user later to retrieve the email address. Select 'Document' as Context. Click the edit icon for the Value field.
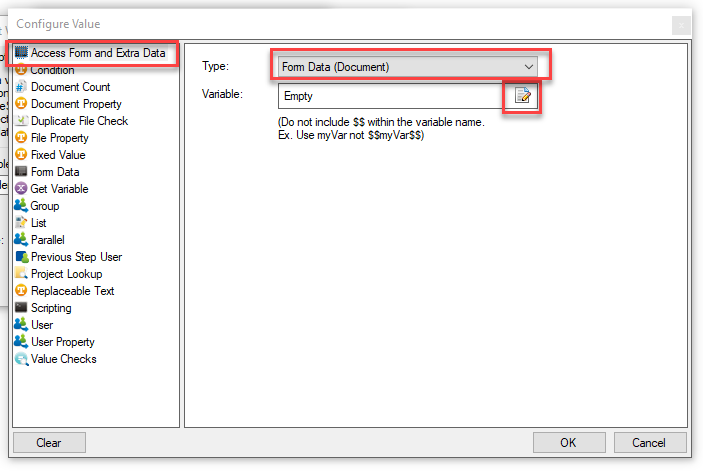
- Select 'Access Form and Extra Data'. Select 'Form Data (Document)' from the 'Type' dropdown (this is usually the default). Click on the edit icon for 'Variable'
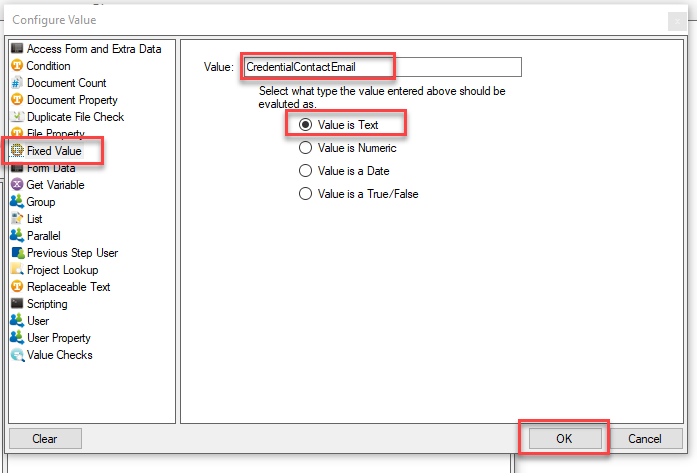
- Click on 'Fixed Value" from the left hand column (this is typically the default and is already selected). Enter in the field name from the e-form that contains the email address you want to save and later send and email to in the 'Value' field. Choose 'Value is Text'. Click 'OK'
- The name of the field that contains the email address on your e-form should now be displayed in the 'Variable' field. Click 'OK'
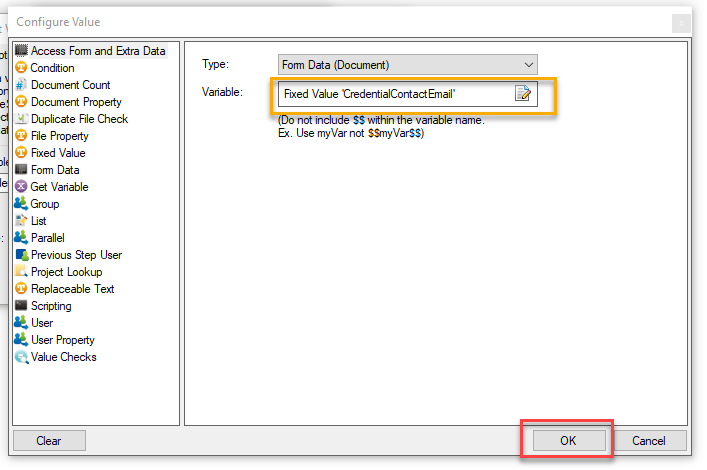
- Click 'OK'
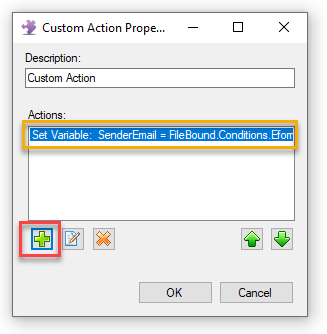
- You should now see your 'set Variable' action in the 'Actions' section of the Custom Actions Stencil. Click the '+' to add the configure your email action
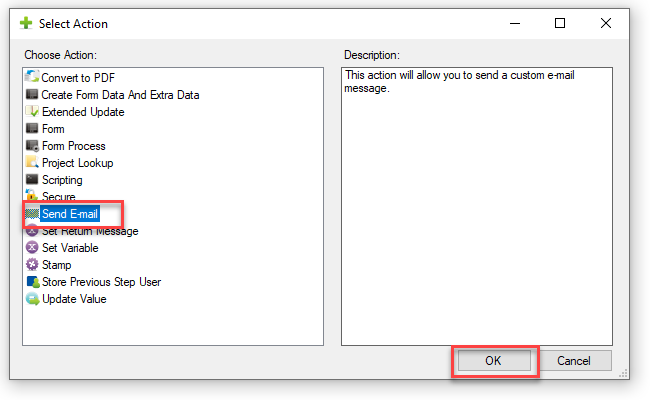
- Select 'Send Email' and then select 'OK'
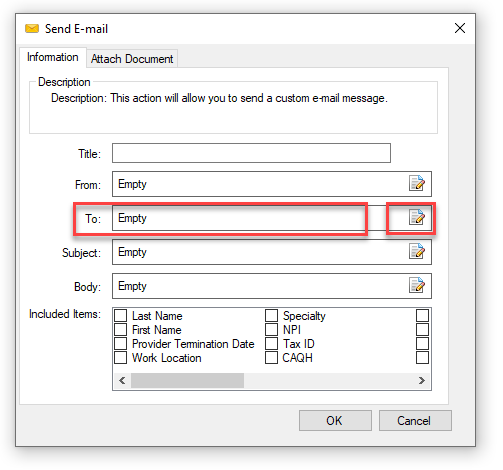
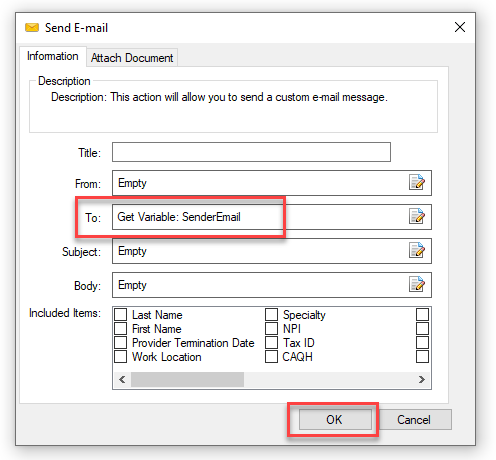
- Click the 'edit' icon in the 'To' field' (this is where you will retrieve the email address you saved from the e-form in the previous action)
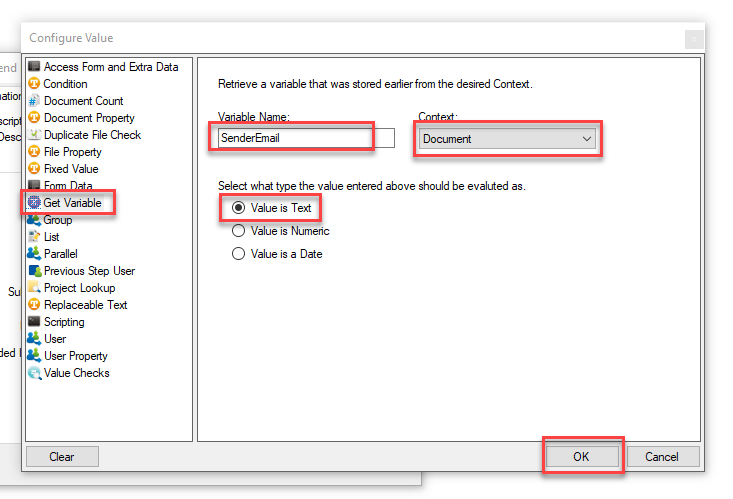
- Select 'Get Variable' from the left hand column. In the 'Variable Name' type in the name you gave the variable when saving it in the previous step (Set Variable). Select 'Document' from the 'Context' dropdown. Select 'Value is Text'. Click 'OK'
- You should see 'Get Variable' followed by the name of the variable you defined in the 'Set Variable' step earlier. Once you have completed the remaining fields click 'OK'
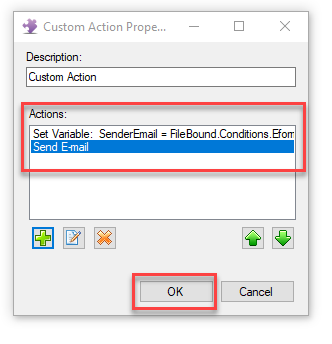
- You should see two actions in your Stencil, one to 'Set Variable' and one to 'Send Email'. Click 'OK'
