
1. On the Navigation menu, click Administration, then click Main Options.
2. Click the Integrations tab.
3. Select the DocuSign integration, then click Edit.
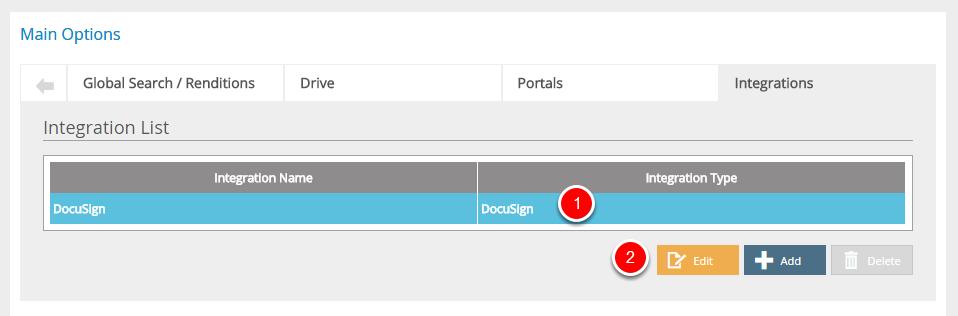
4. In the DocuSign Settings window, configure the DocuSign integration, then click Save.
DocuSign Account Information
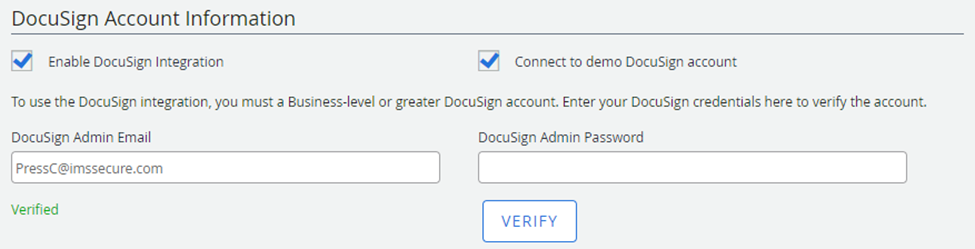
Enable DocuSign Integration: Enables the DocuSign integration.
Connect to demo DocuSign account: Connects to a demo DocuSign account. See Obtain a free DocuSign demo account for more information.
DocuSign Admin Email: The email address of the DocuSign Administrator.
DocuSign Admin Password: The password for the email address provided.
DocuSign Integration Options
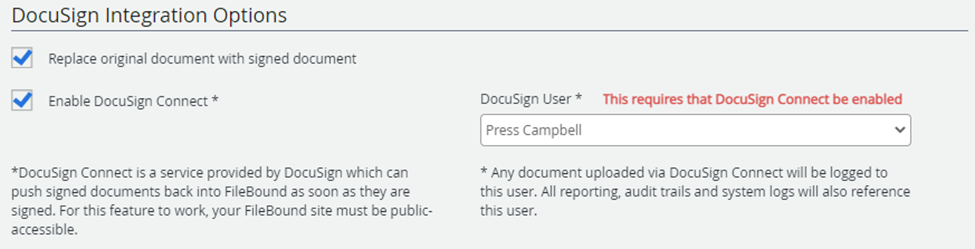
Replace original document with signed document: Automatically replaces the original document in FileBound with any document imported from DocuSign. If this option is not selected, a new document will be created in FileBound.
Enable DocuSign Connect: Automatically imports a document back into FileBound once it has been signed by all recipients. If this option is not selected, users need to manually import the signed documents from a viewer. See Configure DocuSign Connect for information about configuring Connect to work with FileBound.
DocuSign User: A user DocuSign Connect will use to upload a document.
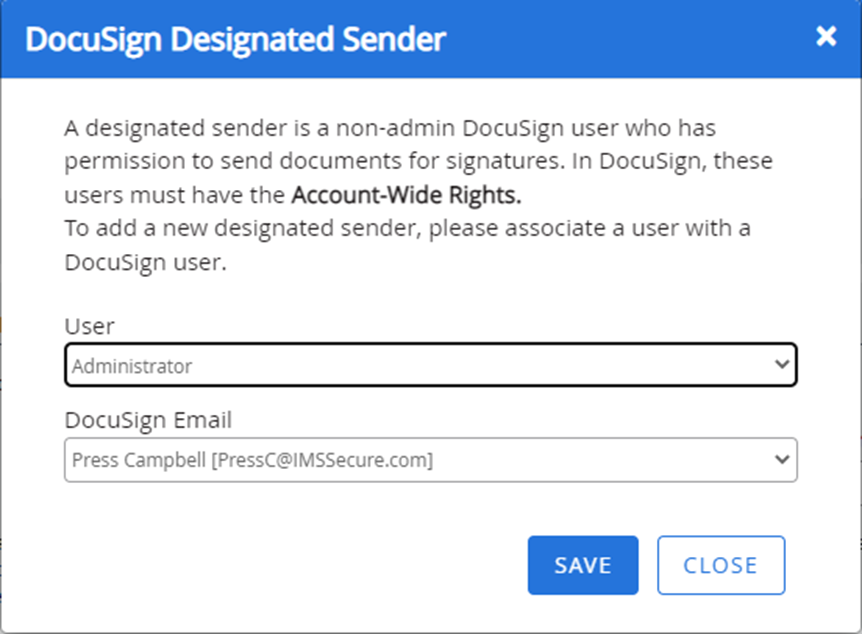
Designated Senders
You need to specify which FileBound user(s) will be able to send a document for signature. When adding a designated user, you need to map them to a DocuSign account. A DocuSign account can be mapped with one FileBound user only.
1. Click Add.
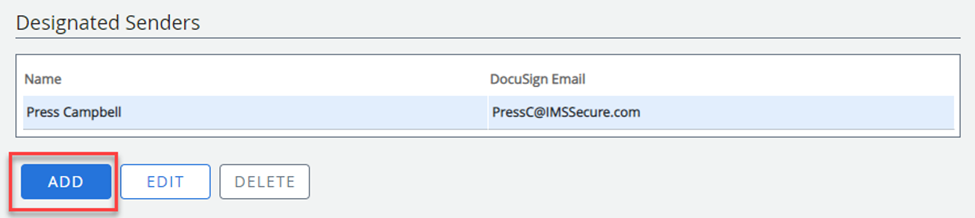
2. In the DocuSign Designated Sender dialog box, select a FileBound user from the User list.
3. Select an option from the DocuSign Email list, to specify the DocuSign account your want to map with the FileBound user.
4. Click Save.
Projects enabled for DocuSign
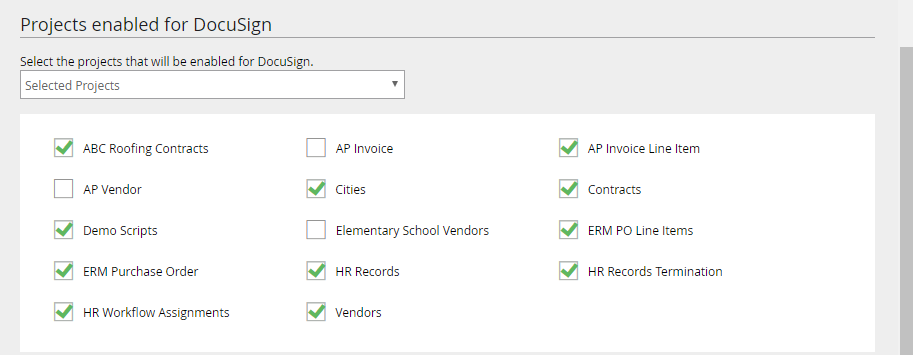
You can enable the DocuSign feature for specific projects or all projects. Select an option from the Select the projects that will be enabled for DocuSign list. The following options are available:
- None: Select this option if you do not want to enable the DocuSign feature for any project.
- All Projects: This option will enable the DocuSign feature for all projects.
- Selected Projects: This option allows you to enable the DocuSign feature for selected projects. You need to select check box next to a project to enable the DocuSign feature for that project.