
For example, newly hired applicants need their status in the HR Records project changed from "Applicant" to "Active". By using the batch update method, you can update all of the files at once instead of modifying them one at a time.
To perform a batch update, please perform the following steps:
Warning: Batch field update of cascade fields does not validate that the selection is valid and may cause data mismatch problems - USE AT YOUR OWN RISK.
Before Processing:
This method involves updating all of the files listed in the clipboard. Please review the current contents of the clipboard before doing this to ensure that you do not update any unnecessary files.
- Add Files that need to be updated to the Clipboard.
- First, do a FileBound search to identify all of the files that you want to batch update. Once you have found the files via a search, add them to the clipboard. If you wish to add individual files to the clipboard, select their check box on the left hand side and select the 'Add to Clipboard' option. This method will allow you to add specific files from different searches, as opposed to adding all files as per method 2.

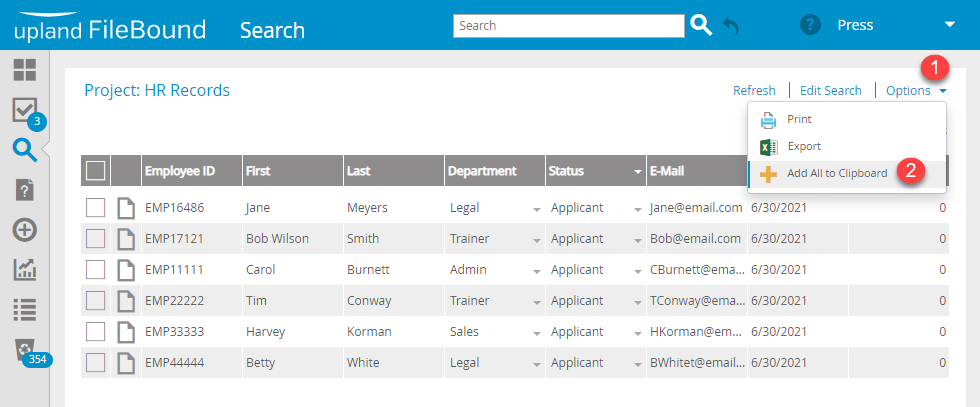
- If you want to add the entire search result to the clipboard, do not select the check boxes on the side. Instead, select 'Options' and then 'Add All to Clipboard'. This will add all of the files to the clipboard, even if there are multiple pages of results.
- First, do a FileBound search to identify all of the files that you want to batch update. Once you have found the files via a search, add them to the clipboard. If you wish to add individual files to the clipboard, select their check box on the left hand side and select the 'Add to Clipboard' option. This method will allow you to add specific files from different searches, as opposed to adding all files as per method 2.
- Batch Update Method:
- Open the clipboard and select the project that contains the files you wish to update. Then, select the 'Options' and 'Batch Field Update' option.
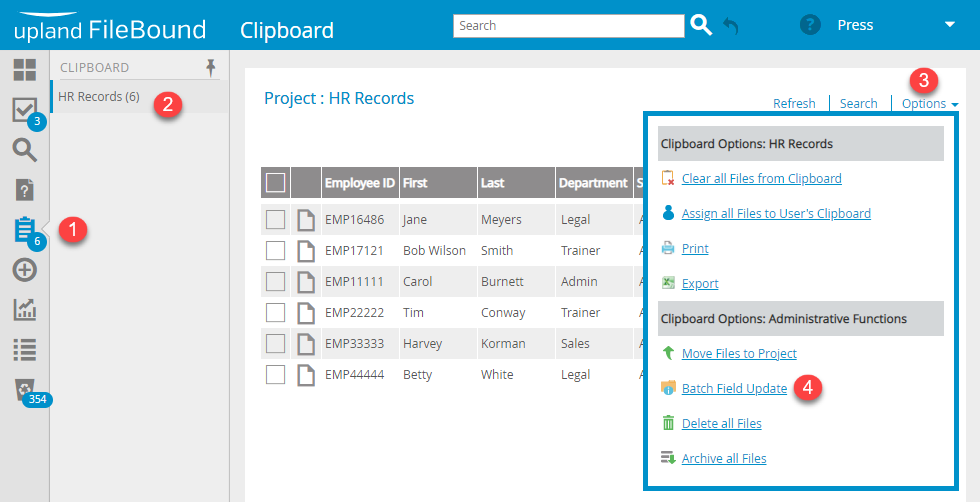
- This will open a panel that will allow you to select which field you wish to update, and the value of that index field for all of the files in the clipboard. Remember that this will update all files in the clipboard for that project, even those that are on a different page to the one you can currently see (if more than one page of files are in the clipboard).
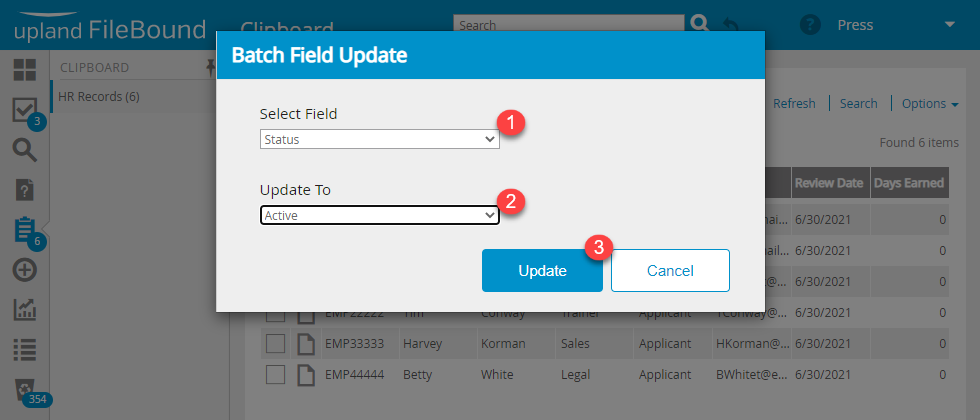
- Select the field you wish to update and the value you want the files to have. Then select 'Update'. The below example will update all files to have a 'Status' value of 'Active'.
- Open the clipboard and select the project that contains the files you wish to update. Then, select the 'Options' and 'Batch Field Update' option.
- Remove from Clipboard:
-
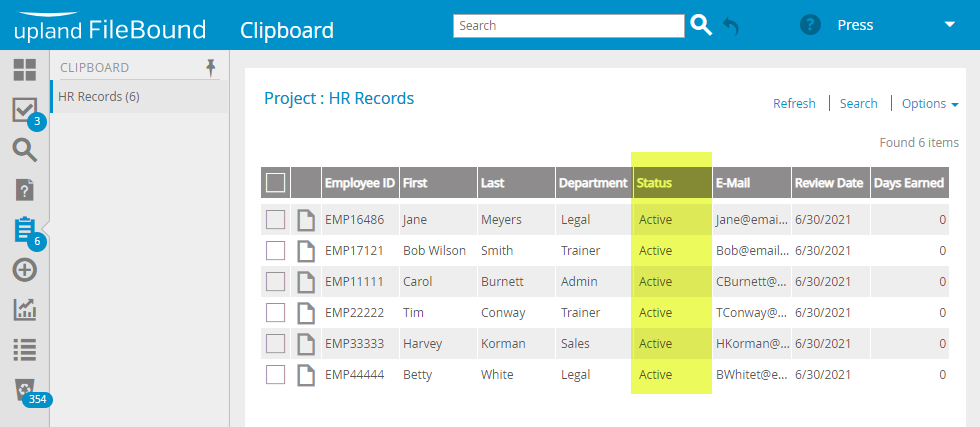
- Once that is complete, you can remove the files from the clipboard by selecting 'Options' and 'Clear File(s) from Clipboard'. This will not delete the files, just remove them from the clipboard.
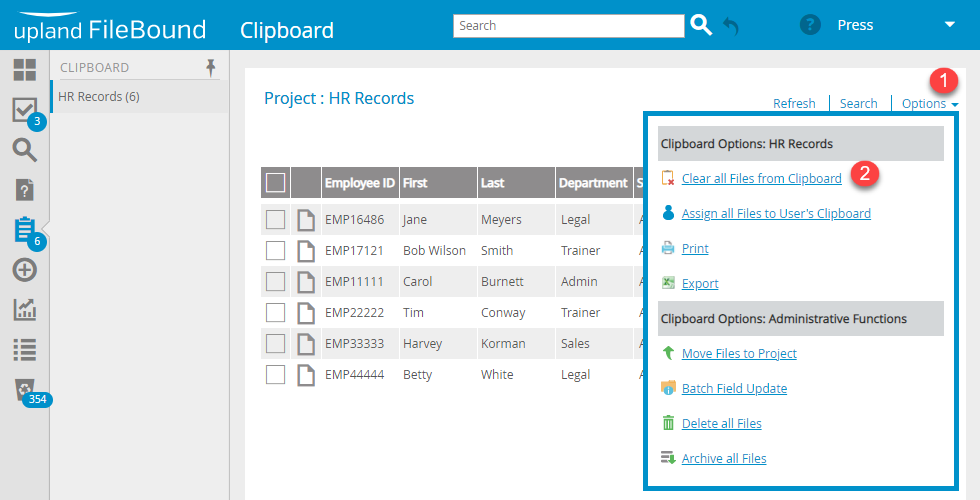
- Once that is complete, you can remove the files from the clipboard by selecting 'Options' and 'Clear File(s) from Clipboard'. This will not delete the files, just remove them from the clipboard.