- Open Epson’s Document Capture Pro
- Select Job Settings
 from Document Capture Pro’s Simple View or from the Standard View select Scan and then select Job Settings.
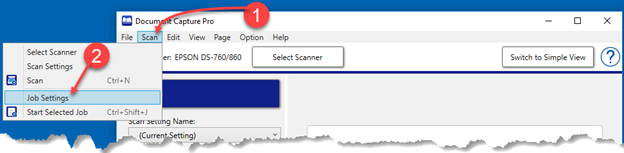
- The Job Management window will open to the current scan job list.

- Add a new scan job by clicking on . Enter a name for the new job such as “Scan to FB Connect”.
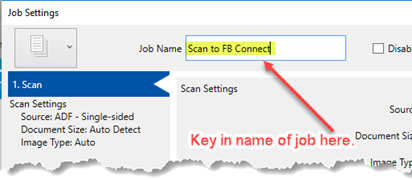
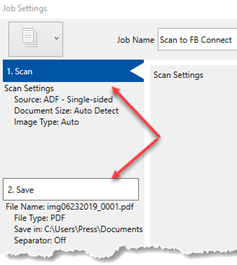
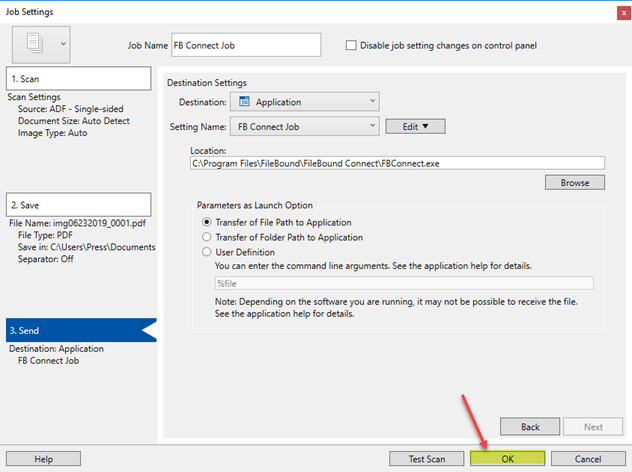
- Work though Job Settings steps 1 & 2 for the desired scan & save settings.
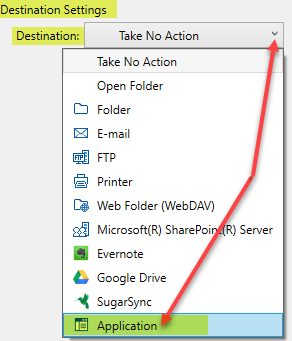
- For Job Settings step 3, Destination Settings, click the Destination drop down list and pick Application.
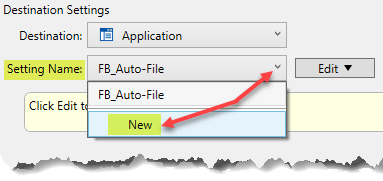
- Select the Setting Name drop down list and select New.
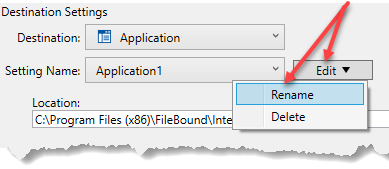
- Select Edit and then Rename
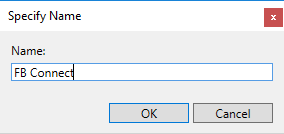
- Give it a meaningful name such as “FB Connect” and click OK.
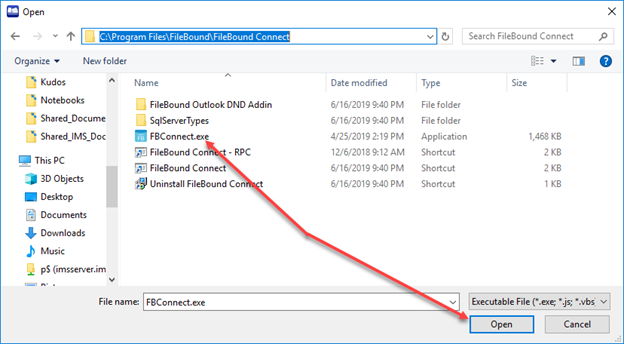
- Click the Browse
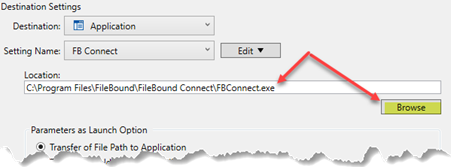
- Browse to the FileBound Connect executable (FBConnect.exe) which by default is in directory C:\Program Files\FileBound\FileBound Connect, select FBConnect.exe and then select Open.
- Select OK.
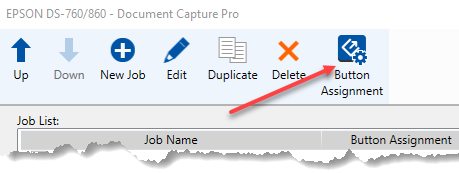
- Click Button Assignment.
- Select the newly created scan job named in step 4 above, “Scan to FB Connect”, from the drop down list for your desired button assignment number. For example, select
 to assigned it to job #1, select
  to assign it to job #2 and so on.
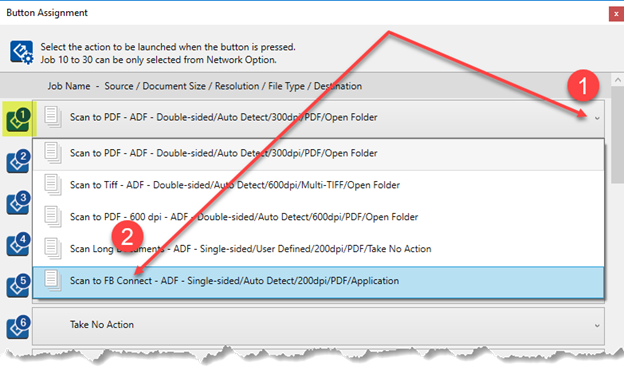
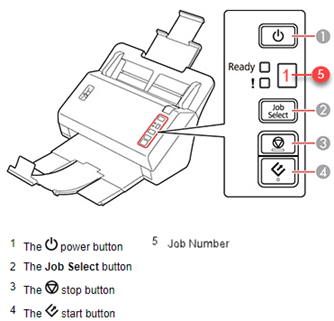
- You can now use the added scan job(s) when you scan from the
 start button. You can only select jobs 1 to 9 with the Job Select button on the scanner.